Winter mornings are magical with snow cream made easy when snow covers everything. Remember catching snowflakes on your tongue as a kid? Now, you can make a creamy dessert for your family. Snow cream is a sweet tradition that brings back childhood memories and adds a touch of kitchen creativity.
Whether you’re new to baking or have lots of experience, this article will guide you. You’ll learn to make snow cream at home using vanilla extract and condensed milk. You’ll find out how to gather clean snow and achieve a silky texture that feels like a warm hug.
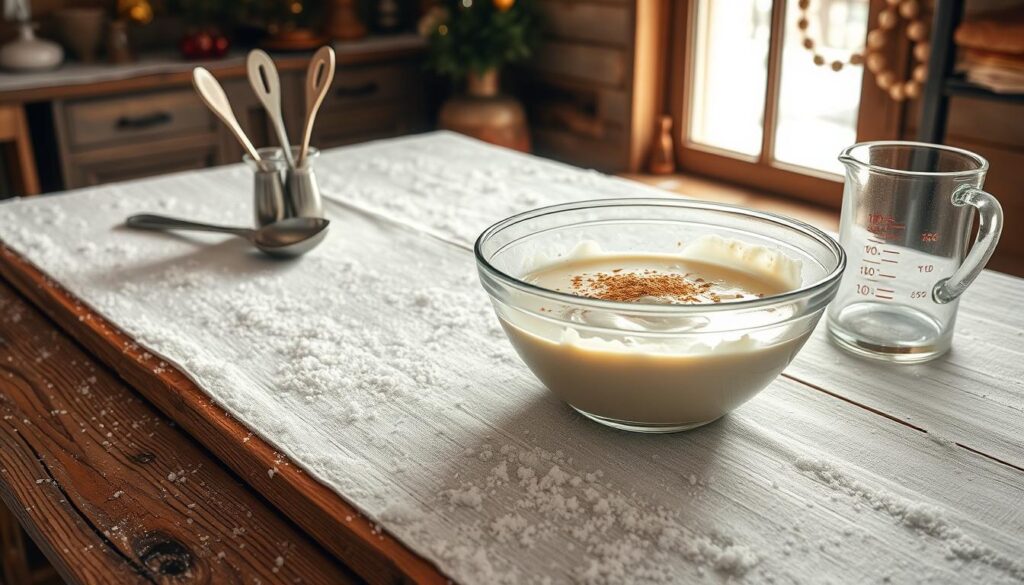
Table of Contents
Key Takeaways
- Create a winter memory with a dessert as simple as bundling up and stepping outside.
- Discover how to make snow cream at home using just five ingredients and basic tools.
- Master tips to avoid common mistakes and ensure every scoop tastes like childhood magic.
- Customize your batch with flavors like chocolate or fruit to suit any palate.
- Enjoy a treat that’s as easy to share as a snowball fight but twice as sweet.
What Is Snow Cream Made Easy? An Introduction to This Winter Delight
Snow cream is a simple treat made from fresh snow, sweetened condensed milk, vanilla, and sometimes cream. It’s unlike store-bought ice cream because it captures winter’s crispness. Its light texture is a refreshing change from richer desserts.
The Nostalgic History of Snow Cream
This frosty treat has roots in early American winters, mainly in the South and Midwest. Families would collect snow to make traditional snow cream recipe, sharing recipes through generations. By the 1900s, it was a favorite in areas with plenty of snow.
Why Snow Cream Remains a Beloved Winter Tradition
Today, people love snow cream for its easy recipe. It needs just a few ingredients and no special tools. Collecting snow is part of the fun, turning a snowstorm into a family activity.
How Snow Cream Differs from Regular Ice Cream
Snow cream doesn’t use churned dairy like ice cream does. Its texture comes from snow mixed with sweeteners. It’s lighter and ready to eat as soon as you mix the ingredients.
Gathering Safe Snow for Your Dessert
Before making your simple snow cream recipe, start with clean, safe snow. Here’s how to pick the best snow for your winter treat.
When and Where to Collect Clean Snow
Look for snow that fell 2–3 hours ago. Stay away from snow near roads, sidewalks, or polluted areas. The best places are open spaces like backyards or fields.
City folks should find spots away from traffic. Also, check the local air quality.
Safety Precautions for Snow Collection
- Avoid yellow or discolored snow—always inspect for debris or animal tracks.
- Use a clean container (like a glass bowl) to collect snow, not plastic bags or unclean surfaces.
- Stay clear of areas treated with road salt or near industrial zones.
How Much Snow You’ll Need
Plan for 8–10 cups of loose snow for 4 servings. Snow gets denser when mixed, so get extra. Use this guide:
| Snow Amount | Servings |
|---|---|
| 8 cups | 4 small servings |
| 10 cups | 4 generous portions |
Keep snow in a sealed container in the freezer until you’re ready. Never let it sit at room temperature.
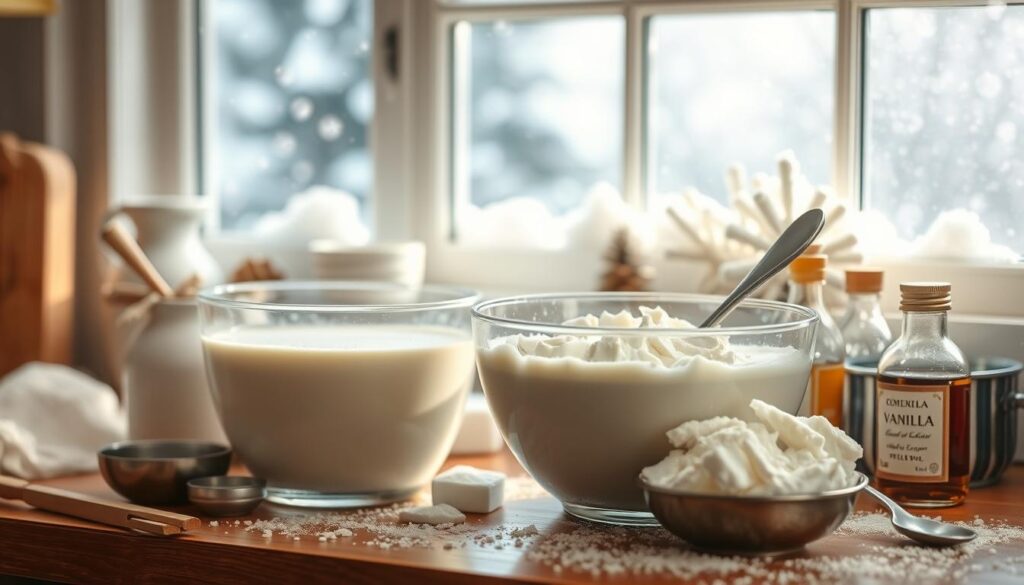
Essential Ingredients for the Perfect Snow Cream
Every best snow cream recipe starts with simple ingredients. Fresh snow is the base, but other ingredients make it creamy. Sweetened condensed milk adds sweetness and creaminess easily.
- Snow: Use clean, freshly fallen snow for the lightest texture.
- Sweetened condensed milk: This thickens the mix and ensures a rich mouthfeel.
- Vanilla extract: Pure vanilla enhances flavor without overpowering the snow’s subtle taste.
- Salt: A small pinch brings out the snow’s natural sweetness.
For a quick snow cream recipe, you can make swaps. Use 1 cup sugar and 1.5 cups milk instead of sweetened condensed milk. Or, try full-fat coconut milk for a dairy-free version. Always choose pure vanilla extract for the best taste.
A standard batch needs 8 cups snow, 1 can (14 oz) sweetened condensed milk, 1 tsp vanilla, and a pinch of salt. Adjust sugar if using unsweetened bases. You can tweak these basics to make it your own while keeping it simple and tasty.
Required Kitchen Tools for Making Snow Cream at Home
Making a snow cream recipe easy doesn’t need fancy kitchen tools. Just get these basics and you’re set to make a cool treat:
- Large bowl (chill it in the freezer first for best results)
- Spoon or spatula for mixing
- Measuring cups and spoons
- Serving dishes or containers
Don’t have a big bowl? A clean cooking pot or chilled casserole dish works great. No measuring tools? Use coffee scoops or marked mason jars. The snow cream recipe easy is all about being flexible!
Common Household Alternatives for Specialized Equipment
Get creative with what you have:
- Substitute a whisk with a fork
- Replace a silicone spatula with a plastic spoon
- Use a liquid measuring cup instead of a scale
Preparing Your Workspace
Clear a cold area near the kitchen sink. Cover surfaces with paper towels and have all ingredients within reach. To avoid spills, have a trash bin ready and a waterproof tablecloth on hand. Keep snow in an insulated container to prevent it from melting too fast!
For a fun family activity, set up different areas for mixing, measuring, and serving. A tidy workspace makes the process smooth and enjoyable.
The Classic Snow Cream Recipe Easy Anyone Can Follow
Start with this simple classic snow cream recipe for a treat that’s as easy as winter itself. Gather these essentials: 2 cups fresh clean snow, one 14-ounce can of sweetened condensed milk, and 1 teaspoon pure vanilla extract.
Step-by-Step Mixing Instructions
- Chill a mixing bowl in the freezer for 10 minutes before starting.
- Pour condensed milk into the chilled bowl, then stir in vanilla extract.
- Gradually mix in snow one cup at a time until the mixture thickens. Stop when it holds shape but still flows slightly.
Achieving the Perfect Consistency
The ideal texture balances creaminess and lightness. The mixture should cling to a spoon but not melt instantly. If too runny, add more snow. Too stiff? Gently fold in a splash of milk.
How to Know When Your Snow Cream Is Ready
Test by spooning a small portion onto a plate. It’s done when it holds its form for 5 seconds before softening. Insert a knife vertically—if it stays upright, it’s perfect. Overmixed? Let it rest 5 minutes to relax.
Delicious Flavor Variations to Try with Your Homemade Snow Cream
Once you’ve mastered the homemade snow cream recipe, try these exciting flavors. From rich chocolate to boozy blends, each adds a new twist to this winter treat.

Chocolate and Vanilla Twists
- Chocolate Snow Cream: Mix ¼ cup cocoa powder and 2 tablespoons sugar into the base. Add a splash of espresso for extra chocolate flavor.
- French Vanilla: Heat 2 egg yolks with ½ cup warm milk until thickened. Then, fold into the cream base. Add vanilla bean pods for a real touch.
- Cookies & Cream: Blend ½ cup crushed chocolate sandwich cookies into the cream. Top with extra crumbs for texture.
Fruit-Infused Options
Mix in ½ cup mashed berries, thawed frozen fruit, or 3 tablespoons jam during mixing. Try:
- Strawberry: Puree fresh strawberries with a dash of lemon juice.
- Peach: Use canned peach slices blended into the base for a summery twist in winter.
- Lavender Lemon: Stir in 1 teaspoon dried lavender and a zested lemon.
Adult-Only Options
For over-21 indulgence, add ¼ to ½ cup of your favorite liqueur to the base before freezing:
- Baileys Irish Cream: Enhances chocolate variations.
- Kahlúa: Pair with espresso and whipped cream for a mocha effect.
- Peach schnapps: Melds well with fruit-infused bases.
Experiment boldly—these homemade snow cream recipe variations make perfect gifts or family traditions. Let creativity guide your winter dessert adventures!
Creative Serving Ideas and Toppings for Your Snow Cream
Mastering the traditional snow cream recipe is just the start. Now, let’s elevate your snow cream with creative toppings and presentation. Start with classics like chocolate syrup, caramel, or whipped cream. Then, try bold additions like crushed Oreo cookies, chopped nuts, or fresh berries.
Get creative with how you serve snow cream. Try it in a mason jar with granola and yogurt, or in a waffle cone for a crunchy twist. For a festive look, use hollowed-out citrus halves or mini pie crusts as bowls.
- Add crushed candy canes for holiday sparkle
- Drizzle dulce de leche for a rich flavor contrast
- Top with toasted coconut or chia seeds for texture
Make themed sundaes with these toppings:
| Topping Combo | How to Make It |
|---|---|
| S’mores Night | Layer graham cracker crumbs, melted chocolate chips, and marshmallow fluff. |
| Birthday Celebration | Mix rainbow sprinkles and tiny cake pieces into the base. |
| Spiced Apple | Sprinkle cinnamon, caramelized apples, and a drizzle of apple pie filling. |
Pair snow cream with warm treats like gingerbread cookies or hot cocoa. This adds a nice contrast in temperature. For a fun touch, set up a toppings buffet so everyone can make their own snow cream dessert recipe. Remember, keep portions small to let each flavor shine!
Troubleshooting Common Snow Cream Problems
Even the best snow cream recipe might hit a snag. These fixes ensure every batch stays creamy and delicious. No need to panic—adjustments are simple!
Fixing Snow Cream That’s Too Watery
Soggy snow cream often means too much melt or thin mix. Try these steps:
- Add fresh snow 1 cup at a time.
- Chill mixture 15 minutes in the freezer.
- Mix 1 tsp cornstarch with milk before combining.
Solutions for Snow Cream That’s Too Sweet
Too much sugar? Balance it with:
- Pinch of salt to neutralize sweetness.
- Extra snow or unsweetened milk to dilute.
- Swirl in sour cream for tangy balance.
Rescuing Grainy or Icy Snow Cream
Rough texture? Fix it by:
- Blending vigorously to smooth lumps.
- Adding 2 tbsp heavy cream for silkiness.
- Blend into a milkshake if icy chunks form.
Mistakes happen—even with the quick snow cream recipe! Use these tricks to save each batch. Adjustments now’t mean failure—they’re part of mastering the craft. Next time, use less snow if watery, taste sweetness early, and mix thoroughly to avoid ice.
Storage Tips for Leftover Snow Cream
While make snow cream at home is best enjoyed fresh, small leftovers can be stored properly. Keep portions in an airtight container for 2–3 days maximum. Here’s how to maintain quality:
- Use a shallow container—this freezes faster, reducing ice crystal formation.
- Cover the surface with plastic wrap before sealing to prevent frost.
- Store in the coldest part of your freezer, not the door.
To revive icy leftovers, let it sit at room temperature for 5–10 minutes. Use a whisk to blend until creamy again. If texture is too grainy, repurpose it:
- Mix into milkshakes for a frosty base.
- Top warm pies or cobblers where texture flexibility matters.
- Puree with juice and freeze into popsicle molds.
| Storage Time | Texture Change |
|---|---|
| 0–2 hours | Creamy and soft |
| 1 day | Slightly icy |
| 3+ days | Hard, crystallized texture |
Adjust batch sizes when you make snow cream at home to avoid leftovers. Smaller portions ensure peak texture every time.
Conclusion: Embracing Winter’s Magic with Homemade Snow Cream
The simple snow cream recipe makes it easy to turn fresh snow into a creamy treat. Just gather clean snow, mix it with milk, sugar, and vanilla. Then, you can customize it to your liking.
This tradition brings families together on snowy days. It’s a fun way to enjoy the snow and make memories. Everyone can add their own twist to the recipe.
Try adding chocolate chips or fruit purees for different flavors. You can also use toppings from your pantry or local favorites. This makes every batch special and fun.
Snow cream shows us how to enjoy nature’s simple pleasures. Its short life reminds us to appreciate the moment. It’s a way to celebrate winter’s beauty, not just get through it.
Next time it snows, don’t just see it as a hassle. Use it to make snow cream and enjoy a sweet treat. It’s a chance to relive the joy of winter and connect with loved ones.
FAQ
What is the best snow cream recipe for beginners?
A simple snow cream recipe starts with 8 cups of fresh, clean snow. Add 1 can of sweetened condensed milk, 1 teaspoon of vanilla extract, and a pinch of salt. This classic recipe is easy and perfect for beginners.
Can I make snow cream at home with any type of snow?
Yes, but only use freshly fallen snow that’s clean and white. Avoid snow that’s discolored or contaminated by road salt, pets, or pollution. This ensures a safe and delicious homemade snow cream.
How can I create different flavors of snow cream?
To customize your snow cream, add cocoa powder for chocolate, fruit purees for fruity flavors, or liqueurs for adult versions. These options let you add a personal touch to your snow cream.
Is there a traditional snow cream recipe that uses only natural ingredients?
Yes! A traditional recipe uses snow, sugar, and vanilla. You can swap natural sweeteners for sweetened condensed milk. This makes a homemade snow cream that highlights the snow’s freshness.
What should I do if my snow cream is too icy or grainy?
If your snow cream is icy or grainy, try remixing it vigorously. If it’s still not smooth, blend it or use it as a base for milkshakes. This common issue can be fixed with a little effort.
How long can I store leftover snow cream?
Store leftover snow cream in an airtight container in the freezer for 2-3 days. Remember, it will become icier. Enjoy it best immediately after making.
What can I do if I don’t have sweetened condensed milk?
If you’re out of sweetened condensed milk, mix regular milk or heavy cream with sugar or powdered sugar. This quick change will still make a delightful dessert.
[…] are deeply rooted in the tradition of steakhouse dining. Steak, as a centerpiece of meals, has been celebrated across cultures—from the Argentine asado to the American steakhouse. The concept of bite-sized […]